Guides
Anime character creator AI: how to design an original character in seven steps
To create an anime character with AI, decide who the character is and what they want, write a precise visual description, then generate a reference sheet and approve it only when every view matches. In Animey, the approved sheet costs 2 credits and becomes the source of every later shot, so the character keeps the same face, outfit and voice for the whole series.
By the Animey team5 min read
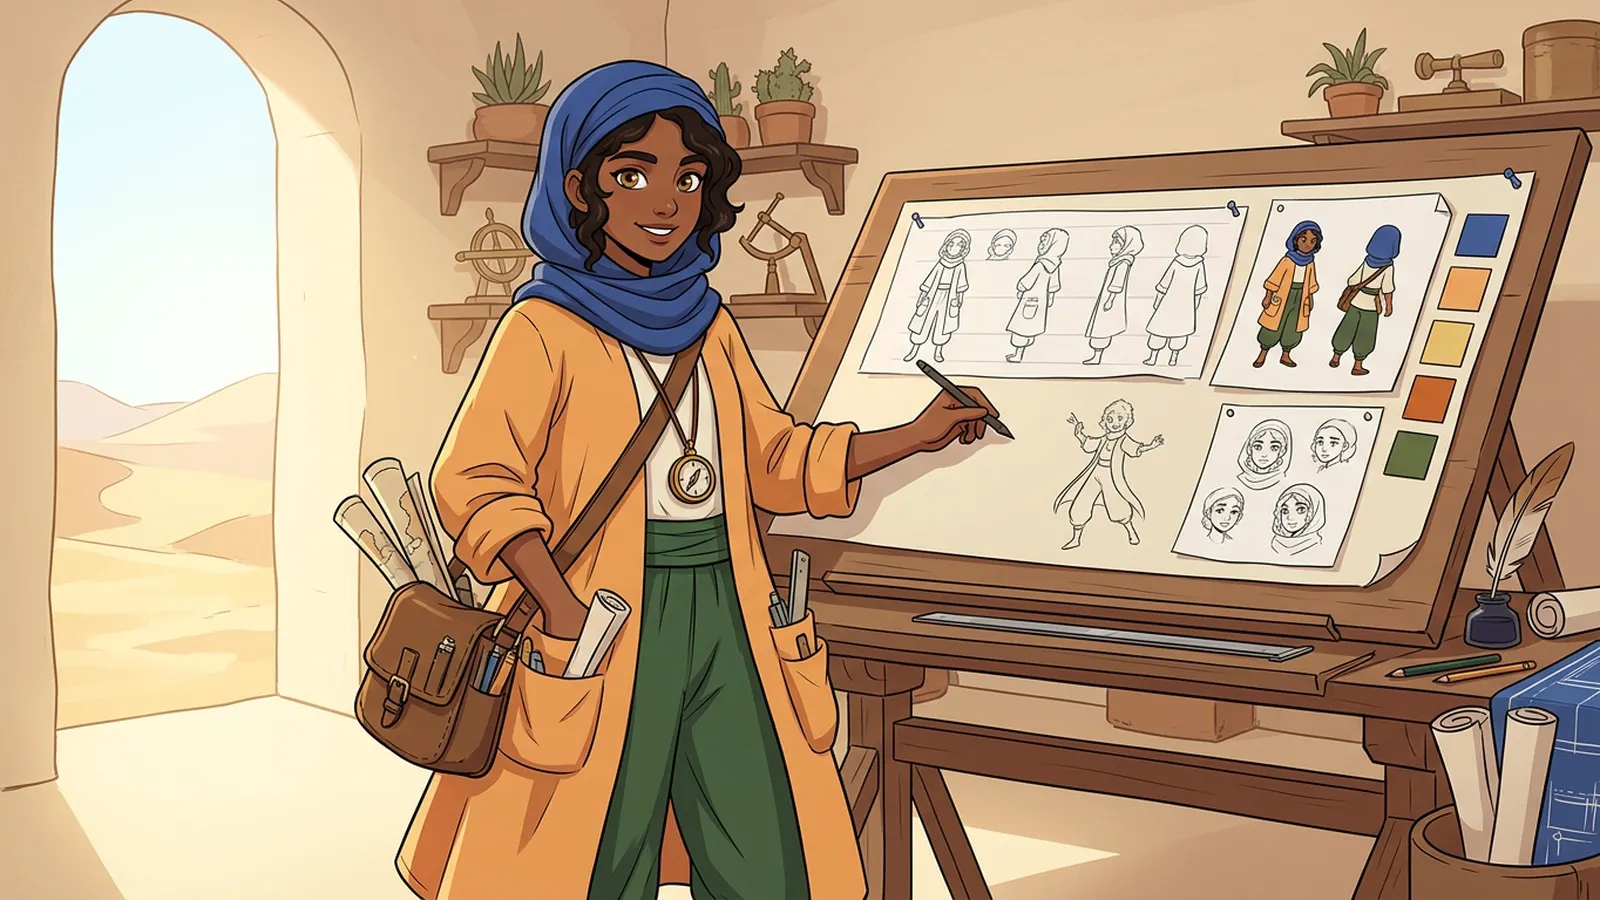
An anime character creator is any tool that turns your idea into a drawing of a character. With AI, the hard part is no longer the drawing; it is getting a character you can use again in the next shot, the next scene and the next episode. This guide follows the way Animey, an AI anime studio by Softforge Digital, builds a character, with the costs as of September 2026, and uses one example from start to finish: Noor, a young desert cartographer.
The steps
Step 1
Start with a role and a want
Write two lines before any looks: who the character is in the story and what they want. “Noor maps the shifting dunes for caravans and wants to find the city her grandfather drew on a map nobody believes.” Then give the role (lead, supporting, antagonist…), an age, a personality and a short backstory. In Animey, this is the character bible, and AI can draft it from your two lines.
Step 2
Find a silhouette you can read
A strong character is recognizable in black: the outline of the coat, the scarf, the satchel. Try a few shapes and keep the one with a clear, unusual edge. For Noor, the long coat with pockets and the headscarf beat the cape and the hat.
Step 3
Write a precise visual spec
Fill every field: hair, eyes, build, outfit, up to six colors, a signature prop and distinguishing marks. Be concrete (“apricot-orange linen coat with map pockets, brass compass on a cord”) rather than poetic. If you have drawn the character yourself, upload the sketch as a reference too. The sheet is drawn from all of this, and every later shot from the sheet.
Step 4
Generate the reference sheet
Animey draws six images in your series style for 2 credits: front, three-quarter, side and back views, a face close-up and a grid of expressions. The front view is drawn first and the other five copy it, so they agree with each other.
Step 5
Fix the weak views, then approve
Redraw any view that drifts, with a short direction such as “arms relaxed” or “show the compass”; up to six redraws per character per day are free. Approve only when all six views match, because approval freezes this version of the character and every shot is drawn from it.
Step 6
Add looks for other outfits or ages
For a night coat, a festival outfit or Noor as a child, add a look: four images (front, three-quarter, back and face) drawn from the approved version for 1 credit. The face stays the same; only the costume or the age changes.
Step 7
Give a voice, then test in a scene
Pick a library voice for free, or describe one and get three designed candidates for 1 credit; for a young character, choose a Child or Teen voice from the library. Then set the character in a location and draw a keyframe: if the character looks right in a real shot, the design is done.
One character, from silhouette to scene
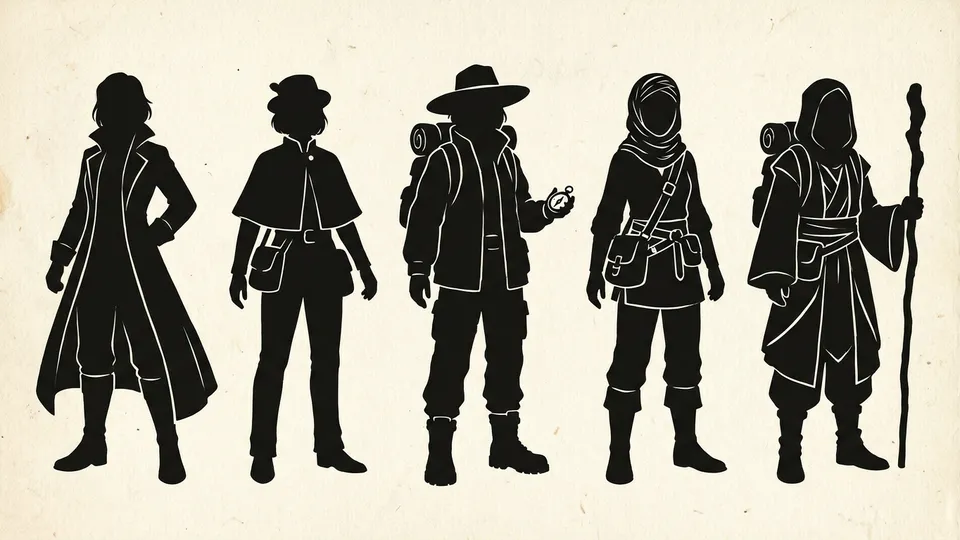
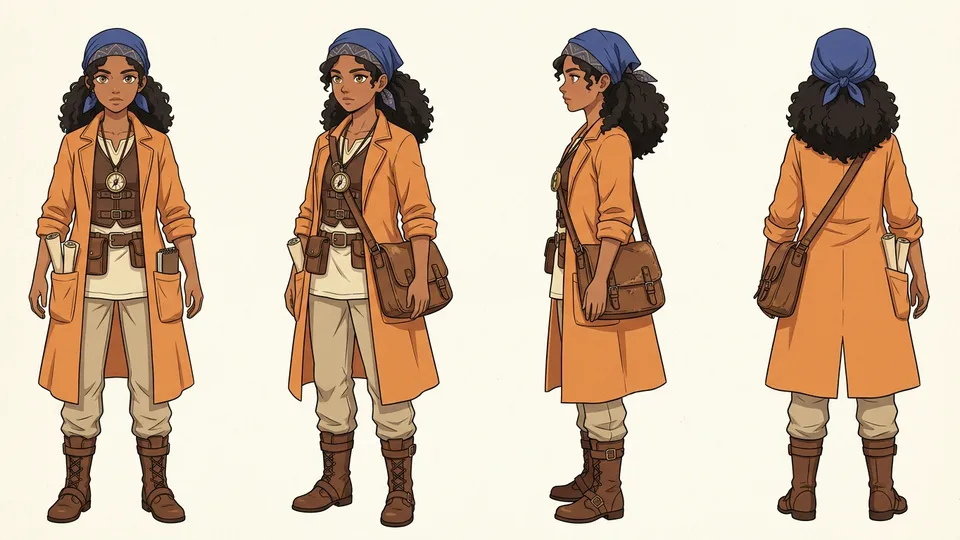
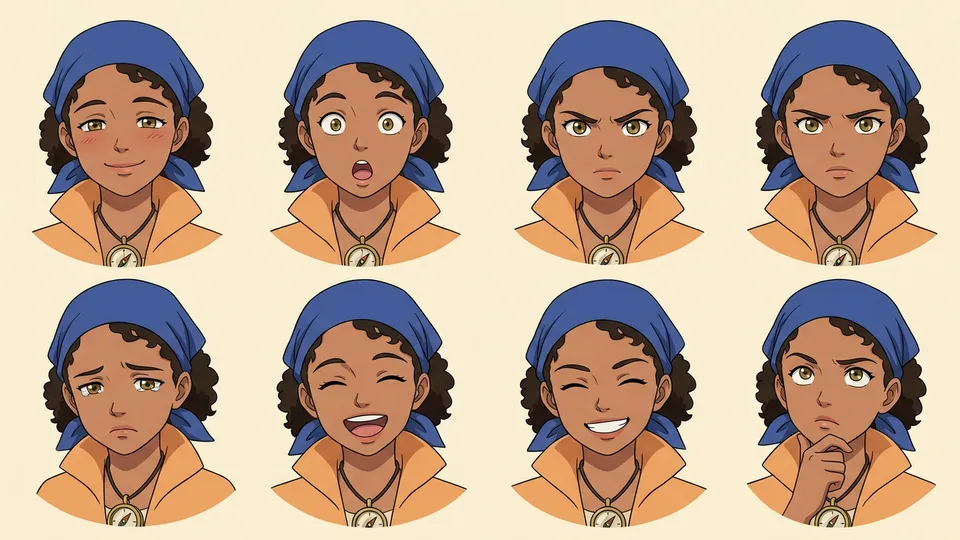
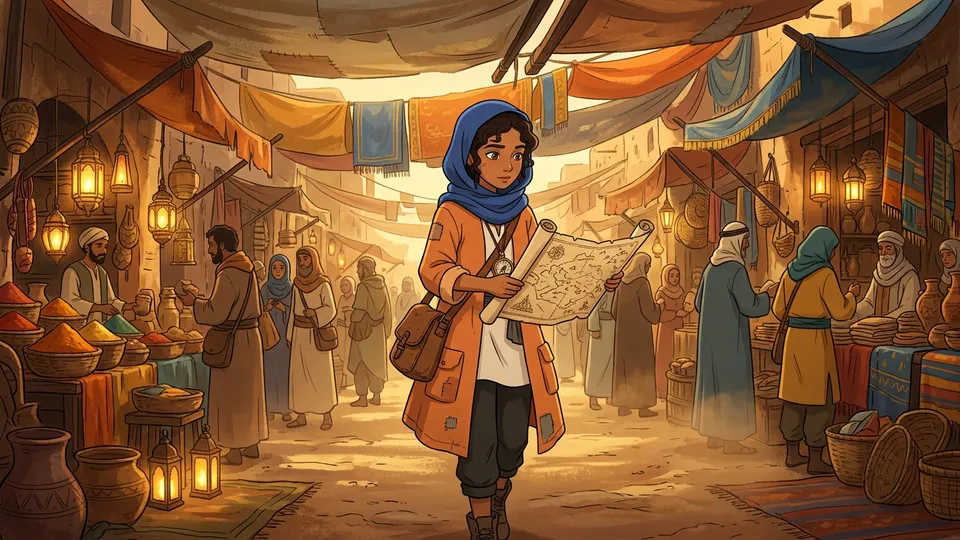
The four pictures follow the order of the steps. The silhouettes choose the shape; the turnaround fixes the proportions and the costume from every side; the expressions show how the face changes without becoming someone else; the scene checks that it all holds in a real frame, with light, a crowd and a prop in the hands.
Why a description alone is not enough
We also asked a text-to-video model for Noor’s turnaround from the description alone, without the sheet. The motion is clean, and it is no longer quite Noor.
That is the whole case for a reference sheet. A description fixes a few traits; a sheet fixes all of them, from every angle. The consistency explainer shows how Animey passes the approved sheet to every keyframe.
Design rules that survive animation
- Keep the palette to three to six colors, with one accent the eye finds first.
- Give the character one signature prop and keep it in most shots.
- Prefer big shapes to fine detail: thin patterns, tiny jewelry and complex embroidery flicker when animated.
- Make asymmetry deliberate: a scarf on one side, a scar on one cheek, and write which side in the spec.
- Write how the character talks too: Animey’s speech profile (talkativeness, vocabulary, line length, common phrases) shapes the lines the AI writes for them.
When the character is approved, the one-afternoon guide takes it through a full one-minute episode, and voices for characters covers the voice step in detail.
Questions this answers
- Is there a free AI anime character creator?
- Animey’s trial gives 10 credits for 30 days, enough for a reference sheet (2 credits) and a few shots. Character bibles written with AI are included, limited to 20 requests a day without a paid plan.
- How do I make my own anime character with AI?
- Decide the role and the want, find a readable silhouette, write a precise visual spec, then generate a reference sheet and approve it when every view matches. Add looks for other outfits and give the character a voice.
- Can I make an anime version of myself or a celebrity?
- Not in Animey. It only creates original characters, and it refuses real people, whether named, described or shown in a face photo, as well as characters from existing works.
- How do I keep my character the same in every image?
- Approve a reference sheet and draw every image from it. In Animey, every keyframe receives the approved sheet, the location plate and the style card, so the face and outfit hold from shot to shot.
Start your own series
Describe your world, cast your characters and plan your first episode, scene by scene.
Start free